Digipack
After my research of digipacks, I noticed that artists of my genre, indie, used simple themes for their digipacks, like Kate Nash or Robyn's. I wanted to have a concept that reflected the theme of the songs I had used for my music video, which was very naturalistic.
Having looked at The Horror's digi-pack, I was inspired by their retro and vibrant look and their clear links to nature.


I was also inspired by the footage of using a projector that I ended up not using in my music video, and decided to use it for my digipack. I set up a projector in a studio, and projected clips of natural environments over my artist.


For my front cover, I wanted to include the title into the photo, so that i wouldn't have to have text over the front, obscuring the image. I edited a picture with the title and projected it over sweater so that it could be read clearly.


For my back cover, I wanted to include all the conventions of a typical CD and make it look as official as possible, so i included the copyright information of a real CD, a barcode, the website of my artists and the titles for all my songs. I wanted to include a proper photo of my artist, showing her face.

For my CD, I wanted to keep it basic, as my research showed that artists I was aspiring to be like kept their's simple with only a block colour with text as the CD. I used a photo from my photo shoot for the back ground to tie in with the rest of the CD. I included the same copyright information that i used on my back cover, and used logos and codes to make it look more legitimate.

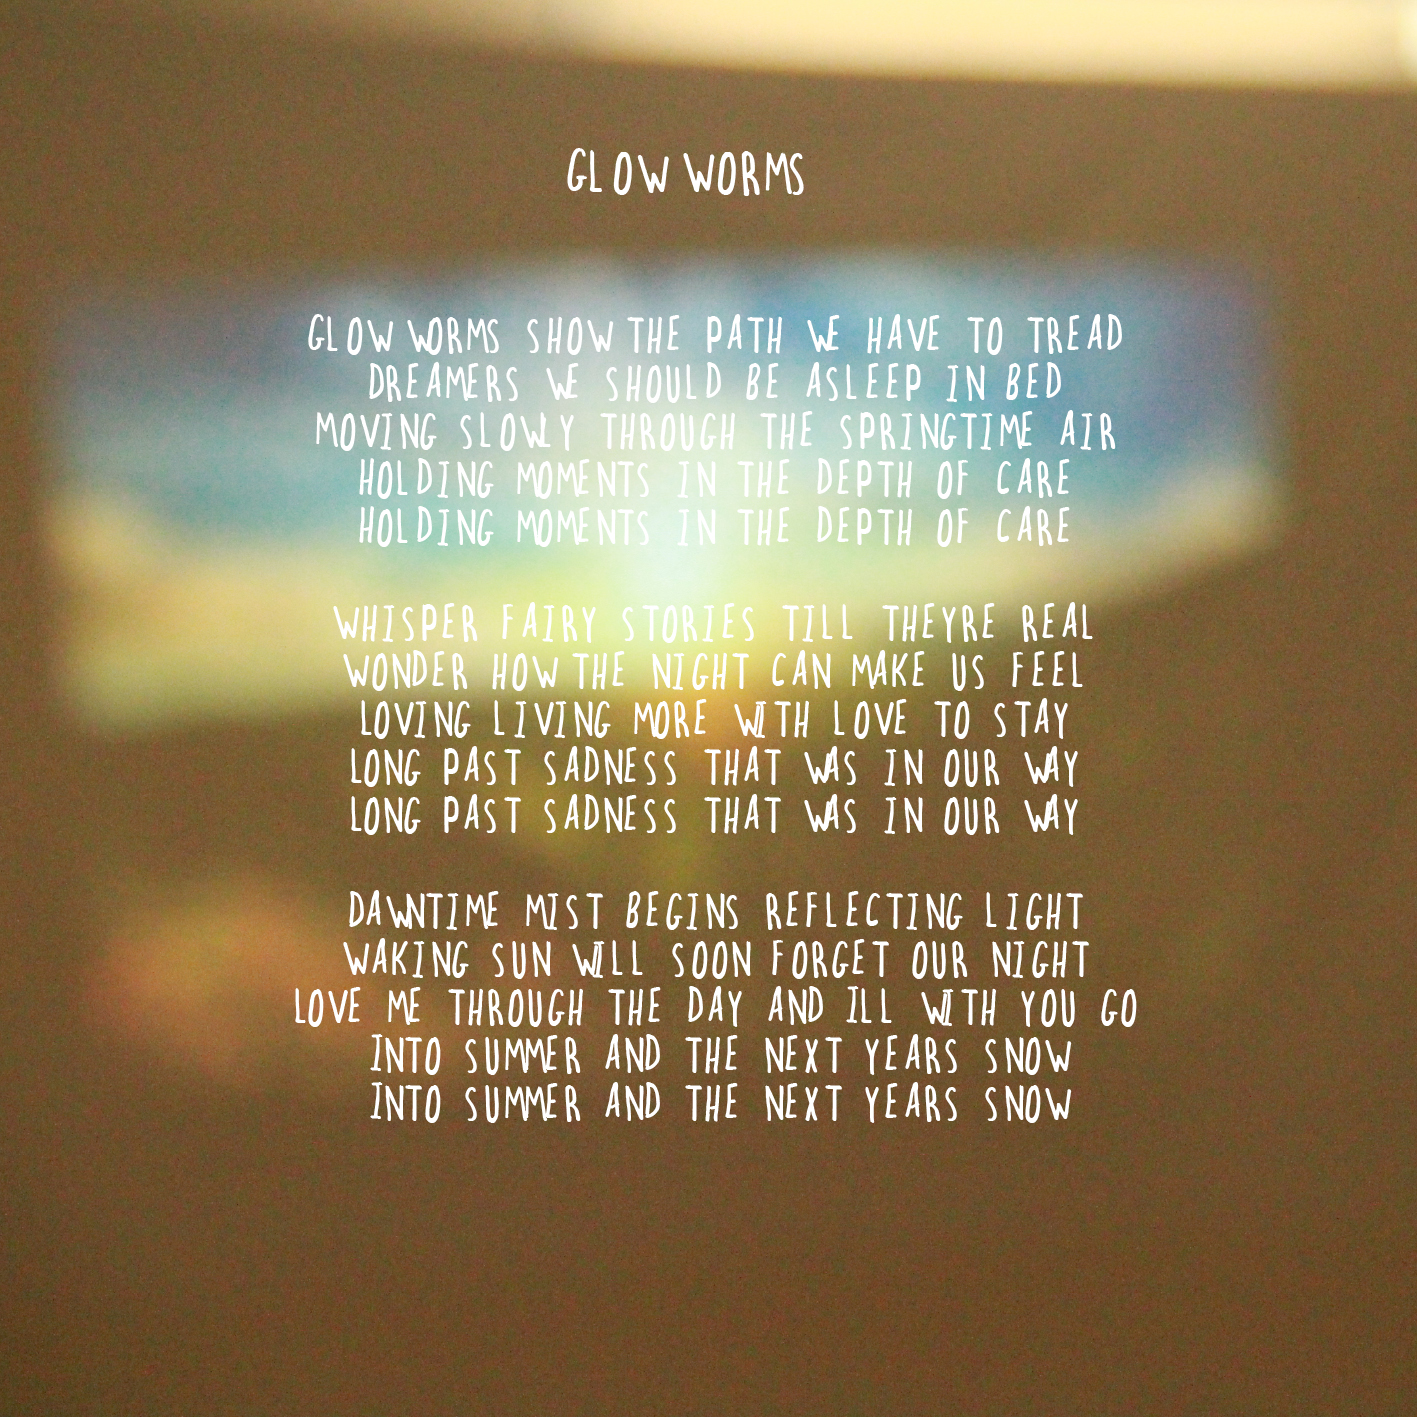
I noticed that for digipacks, artists had booklets with images and song lyrics. I used photos from my shoot to create this booklet, and used lyrics from songs i included on my back cover.


Here is my finished digipack.

Poster
For my poster, I wanted to show more of the artist so I took a whole new photo shoot. I still wanted to keep in with the theme of nature but not have it look too similar to my video. I chose a different beach and in a different climate to my video. This was my favourite photo from the shoot. But i wanted to extend the top of the picture so it fit into the same format as the rest of my researched posters.

I went on indesign and opened my picture in a new document and imported my photo into it. I used the rectangle tool to create box on the blank space above my photo.


This was my finished result.

I wanted to make the photo more interesting, so I experimented on photoshop. I downloaded some textures, then imported it to the top and bottom of my photo. I changed the opacity to make it blend better.

I changed the blending mode to Colour Burn to make it blend even more into the photo.

This was the finished result.

This is an example of one i tried to experiment with, but found that I did not like the colours as much.


Next, i wanted my poster to look at realistic and professional as possible, to i downloaded the same font HMV use in their posters, Arial Rounded MT Bold. I applied this font to all my writing, apart from the artists name and album, as my research showed, the artist usually has a default font they use throughout their promotion. I also used the same logos in my poster as typical HMV posters would use. I included my final album cover I had previously created.

Here is my finished poster.

No comments:
Post a Comment